
Getting started
-
Create an account
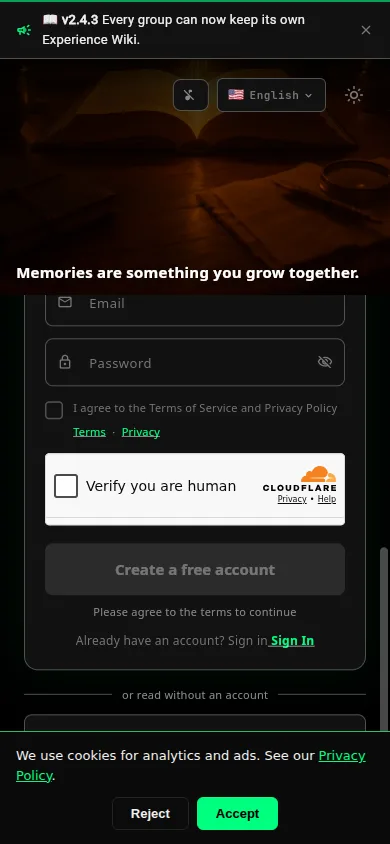
Opening the app takes you straight to sign-up. Enter your email and a password, agree to the Terms, complete the human check, then tap Create a free account. Already have an account? Use Sign In underneath.
-
Create a group
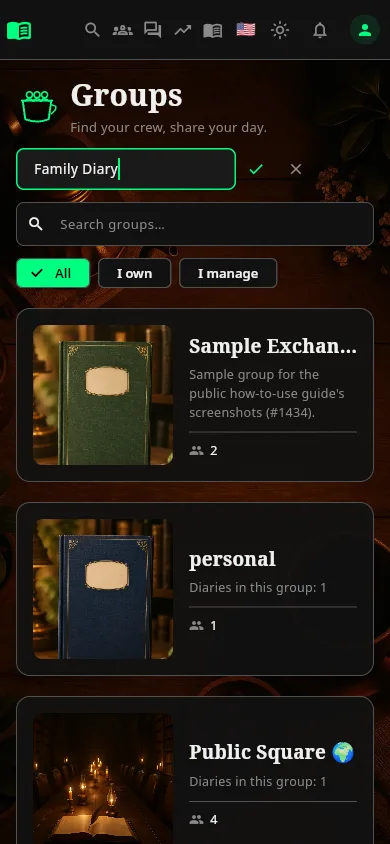
On the Groups page, type a name for the group and tap the check mark. Nothing is created until you do; the × cancels.
-
Invite the other person
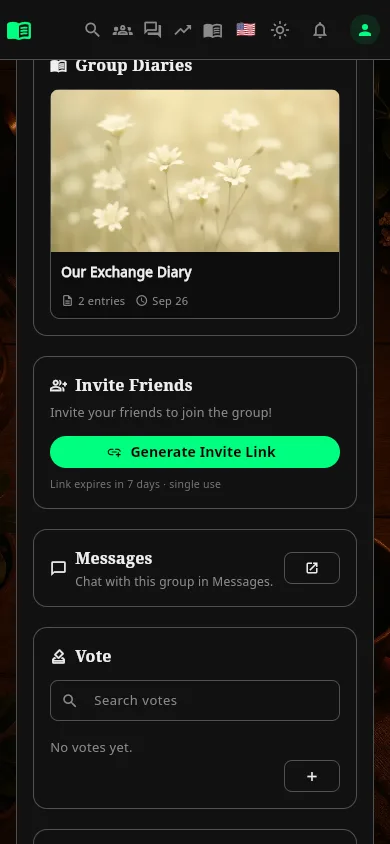
Open the group and find the Invite Friends card. Generate Invite Link makes a link you can send by any messenger. Each link works once and expires after 7 days, so make one per person.
-
Decide whether the group is public
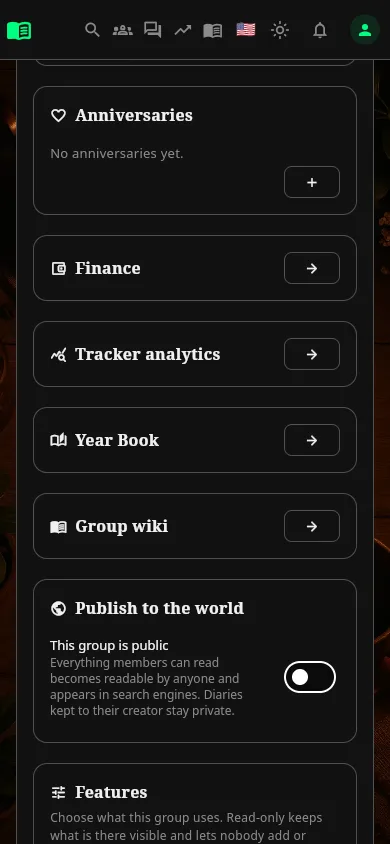
A group is private until you change it. Further down the group page, the Publish to the world switch makes everything members can read readable by anyone and findable in search engines. Diaries kept to their creator stay private either way. Leave it off unless that is what you want.
-
Start the first entry
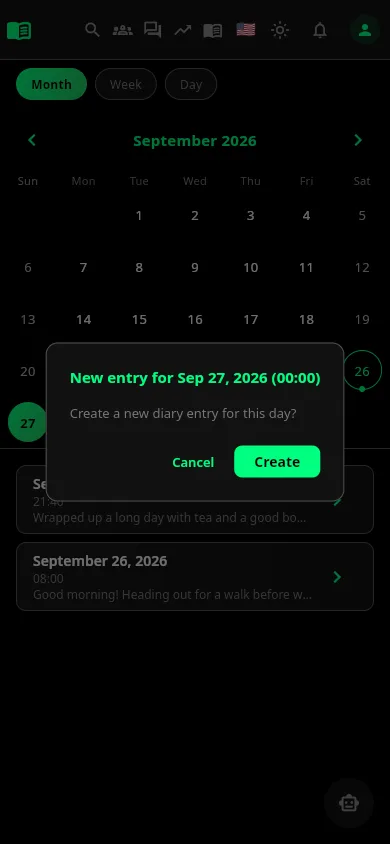
In a diary's calendar, tap an empty day. whatcha asks Create a new diary entry for this day? — tap Create.
-
Put a time on what you write
Start a line with a time in braces, such as
{21:40}. In Preview that line — and the lines right under it — become a sticky note carrying that time; in Source it stays as you typed it. The exact rules are under Tags you can write in an entry.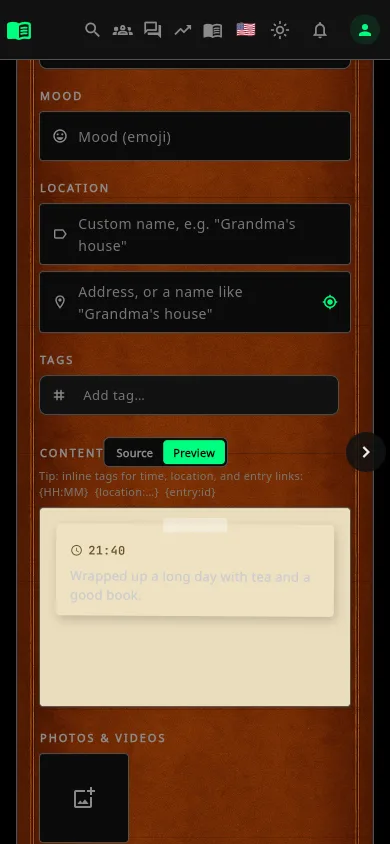
-
Write the same day together
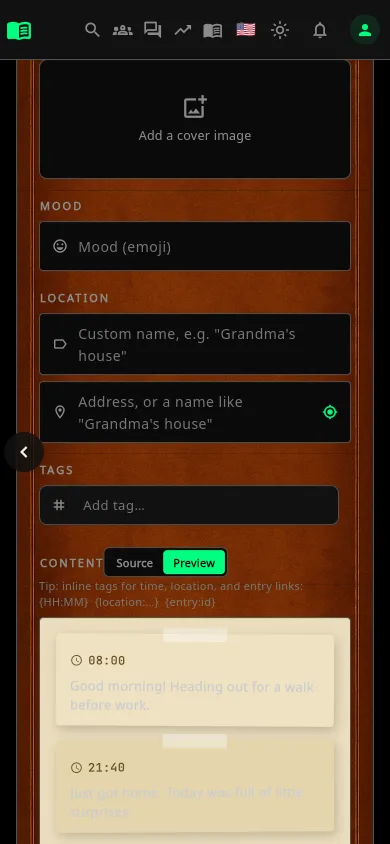
When someone else writes on the same day, their passage is added to the entry instead of replacing yours, and the notes line up by time — here, 08:00 from one person and 21:40 from the other.
-
Choose who can find your profile
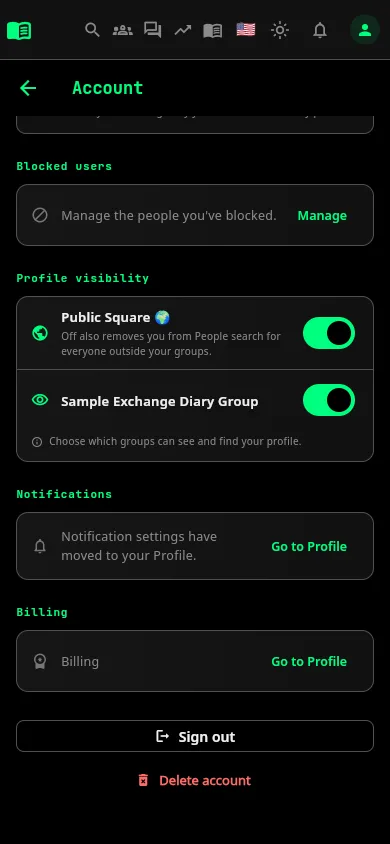
Under Account → Profile visibility, choose which groups can see and find your profile, and whether you appear in the Public Square. This only concerns your profile; it is separate from publishing a group or a diary.
Tags you can write in an entry
Besides plain text, the body of an entry understands a few tags in braces. While you are editing, the app lists them just above the text.
{21:40}— a time. At the start of a line it starts a sticky note; in the middle of a sentence it is a small time chip (🕒 21:40).{06:05:20:00}— a span of time, shown as 06:05–20:00. Works in both places, like a single time.{location:Kyoto Tower}— a place, shown as a chip (📍 Kyoto Tower). Use as many as you like, for example one per sticky note.{entry:…}— a link to another entry (🔗). You do not have to type the id: open the other entry, use Copy Reference, and paste.
While editing, the toolbar above the text has buttons that insert a time, a place or an entry link for you.
Where a sticky note starts and ends
- Only a time at the very start of a line starts a note. The same
{09:00}in the middle of a sentence stays a chip. - Lines directly under it, with no empty line in between, belong to the same note.
- An empty line ends the note. What follows is ordinary text again, until the next line that starts with a time.
{08:00} Good morning!
Heading out for a walk.

This paragraph is not on a note.

{21:40} Home again. Had dinner at {location:Kyoto Tower} around {18:30}.
This gives two notes, 08:00 and 21:40, with an ordinary paragraph between them. The {18:30} inside the second note stays a chip, and the place becomes a 📍 chip.
Things that catch people out
A saved entry opens for reading
Opening an entry that is already saved shows it as a page to read: nothing can be typed into, and there is no Save Entry or Delete Entry. To change it, press Edit first.
Preview and Source
While editing, the switch above the text decides how the body is shown. Source is exactly what you typed, braces and all — this is where you write. Preview draws it the way readers will see it: sticky notes, chips and links. If a tag does not look right in Preview, fix it in Source.
The Preview button at the bottom, next to Save Entry, is something else: it shows the whole entry as it will read. It does not save anything — only Save Entry does.